Recently, we launched a new tool called the Supervisor, which is specifically designed for developers.
You can find it in the Advanced section of our Web Hosting Control Panel.
In a recent blog post, we demonstrated how you can use the Supervisor to run a chat server over the WebSocket protocol.
In this post, we’ll show you another practical use of the tool – using it to install Ruby on Rails on your web hosting account.
Can you explain the purpose or focus of Ruby on Rails?
Before Ruby on Rails emerged in 2004, building web applications was often a challenging and unexciting task. However, the global community of programmers sought to simplify and even make the process enjoyable, laying the foundations for Ruby on Rails.
Today, there are numerous projects powered by Ruby on Rails, including popular platforms like SoundCloud, GitHub, Airbnb, Hulu and Zendesk.
To its creators, Ruby on Rails represents a philosophy that revolutionizes the approach to application development, rather than simply being a software framework.
What sets Ruby on Rails apart from other web application frameworks is that it places a great deal of importance on the emotional value of creating applications and optimizes code usage by minimizing repetition and defining classes.
You can find more information about the philosophy of Ruby on Rails on the official website.
Instructions on how to install Ruby on Rails in a Linux
To begin building Ruby on Rails applications, you will need to install several pieces of software, including Ruby, the Rails Framework and a compatible database system such as SQLite, MySQL, or PgSQL.
If you are using Linux, the recommended tool for installing Ruby on Rails is rbenv, which is a lightweight Ruby Version Management Tool.
The following steps outline how to install rbenv and Ruby on Rails.
Note that you will need SSH access to your web hosting account to carry out the installation.
Step 1: Install rbenv
The first step in installing Ruby on Rails using rbenv is to install the rbenv tool itself and set the necessary environment variables. This can be accomplished by executing a specific set of commands, which are outlined below.
$ cd
$ git clone git://github.com/sstephenson/rbenv.git .rbenv
$ echo ‘export PATH=”$HOME/.rbenv/bin:$PATH”‘ >> ~/.bashrc
$ echo ‘eval “$(rbenv init -)”‘ >> ~/.bashrc
$ . .bashrc
$ git clone git://github.com/sstephenson/ruby-build.git ~/.rbenv/plugins/ruby-build
$ echo ‘export PATH=”$HOME/.rbenv/plugins/ruby-build/bin:/usr/local/nodejs/bin/:$PATH”‘ >> ~/.bashrc
$ echo ‘export TMPDIR=/home/tmp/’ >> ~/.bashrc
$ . .bashrc
Step 2: Install Ruby
After installing rbenv and setting the necessary environment variables, the next step is to install a specific version of Ruby. In this case, the preferred version is 2.7.5. To do so, you can use the following command:
$ rbenv install 2.7.5
To make the preferred version of Ruby the default, you can use the following command:
$ rbenv global 2.7.5
To confirm that the correct version of Ruby has been installed and set as the default, you can use the following command:
$ ruby -v
If the installation was successful, this command will return the following output:
ruby 2.7.5p203 (2021-11-24 revision f69aeb8314) [x86_64-linux]
In order to manage your application dependencies more effectively, it’s recommended that you install the Bundler gem. To do so, you can use the following command:
$ gem install bundler
If you don’t want to install documentation for the gem, you can use the following command instead:
$ echo “gem: –no-document” > ~/.gemrc
Step 3: Install Rails
To install version 7.0.2.2 of the Rails framework, you can use the following command:
$ gem install rails 7.0.2.2
After installing Rails, you should run the following command to make the Rails executable available:
$ rbenv rehash
To confirm that the correct version of Rails has been installed and set as the default, you can use the following command:
$ rails -v
If the installation was successful, this command will return the following output:
$ Rails 7.0.2.2
That’s it! You have now installed and set up Ruby on Rails on your Linux system.
How to test Installation
To test whether your Ruby on Rails installation is successful, you can create a demo project by running the following commands:
$ mkdir rails
$ cd rails
$ rails new demo
$ cd demo
$ touch run.sh
$ chmod +x run.sh
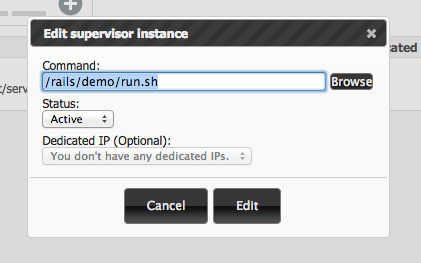
After creating the demo project, you should create a Supervisor instance from your Web Hosting Control Panel using the following command:
/rails/demo/run.sh

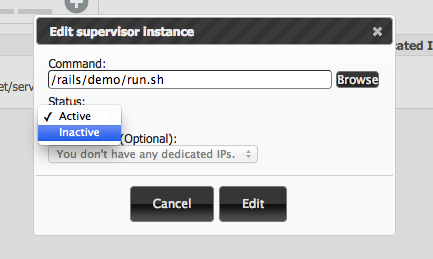
where the status should be set to ‘inactive’:

Once the instance is generated, a port generated by our system will appear in the supervisor table:

Please substitute the newly generated port number in the following command:
$ echo ‘#!/bin/bash
. /home/.bashrc
cd /home/rails/demo
exec rails server -p -b 0.0.0.0′ > run.sh
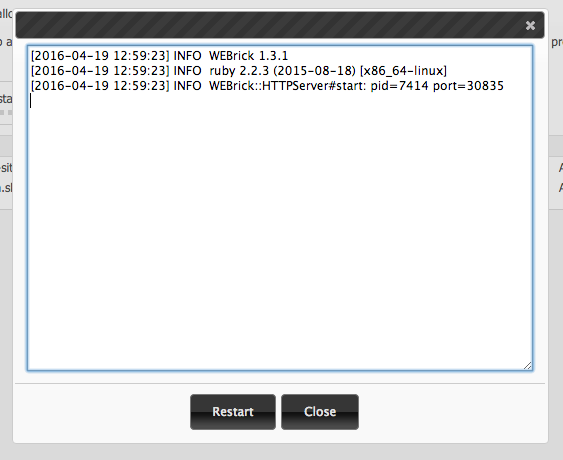
Once you execute the command, you must return to the Supervisor section and activate the Supervisor instance. To ensure that the Ruby on Rails server is operational, click on the View buffer link in the Supervisor table. The output should display as follows:

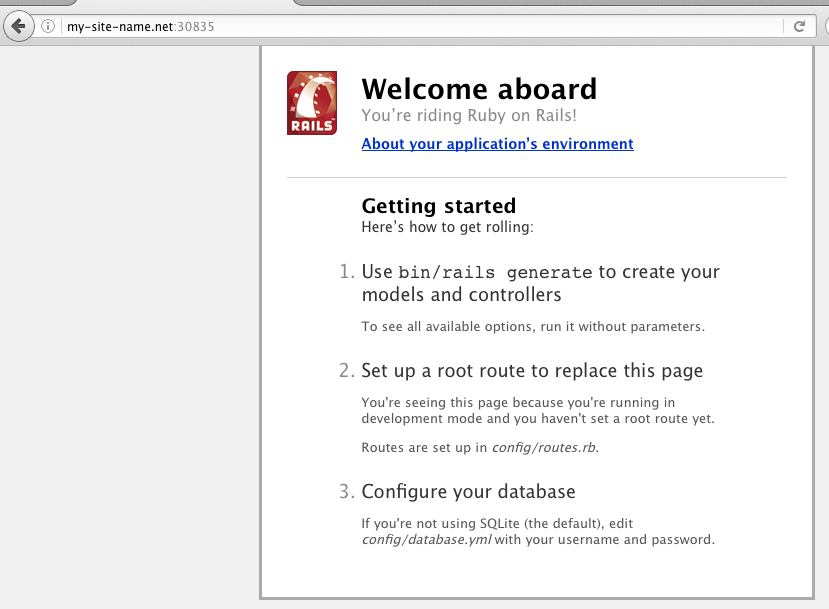
Next, launch your web browser and input the following address in the URL bar:
http://<host>:<port>
Here, <host> refers to any functional hostname in your account and <port> indicates the allocated port number for the Supervisor instance.
The webpage should showcase a message such as “Welcome aboard” or “Congratulations”.
